Email Setup Guide for Android Mail App (Secure IMAP)
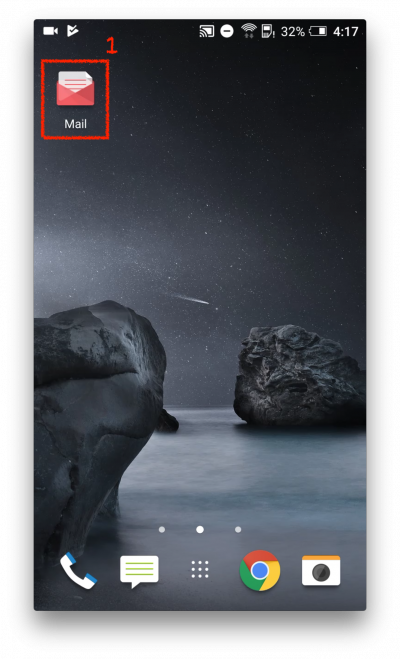
1. Launch the Mail app.
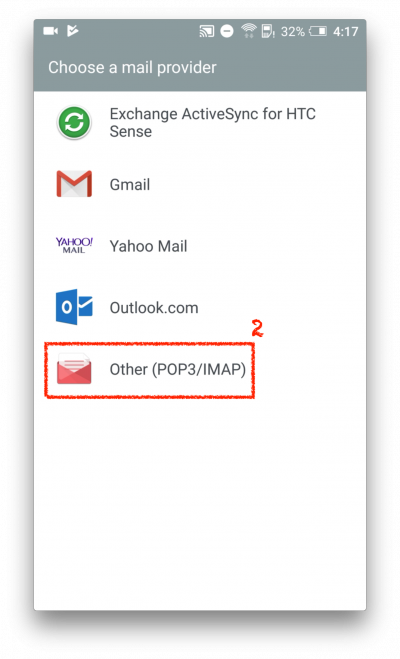
2. Select Other (POP3/IMAP).
Note: If you are setting up a second account on the phone, click on the icon the and select Add Account to proceed.
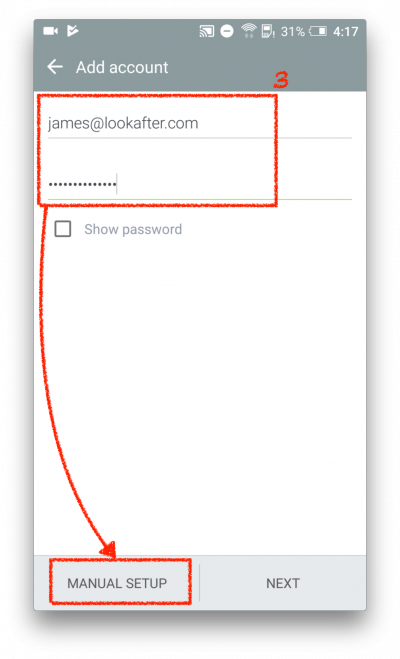
3. Then on the “Add Account” screen, enter your email address and password, and click MANUAL SETUP.
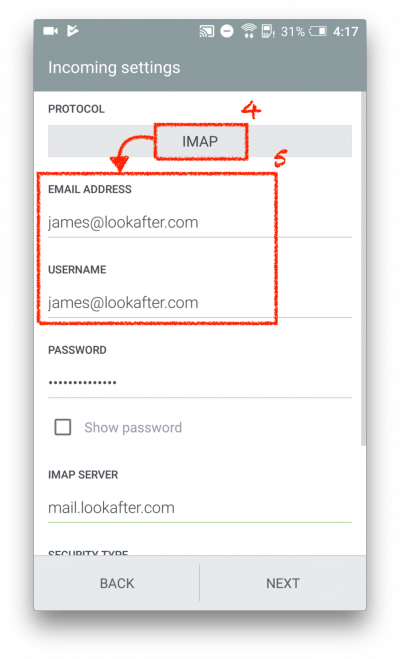
4. Select IMAP as the protocol.
5. Make sure the “EMAIL ADDRESS” and “USERNAME” fields are filled with your email address.
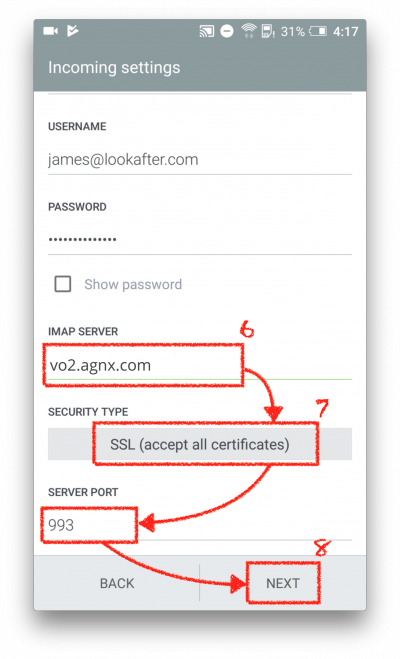
6. Scroll down the screen. Enter your mail server into “IMAP SERVER”: vo1.agnx.com / vo2.agnx.com / v1.agnx.com / g1.agnx.com
*IMPORTANT: Please consult AfterOffice Support to confirm which server to be used for your domain.
7. Then, select SSL (accept all certificates) as the “SECURITY TYPE”, and make sure the port number is 993.
8. Click NEXT to continue.
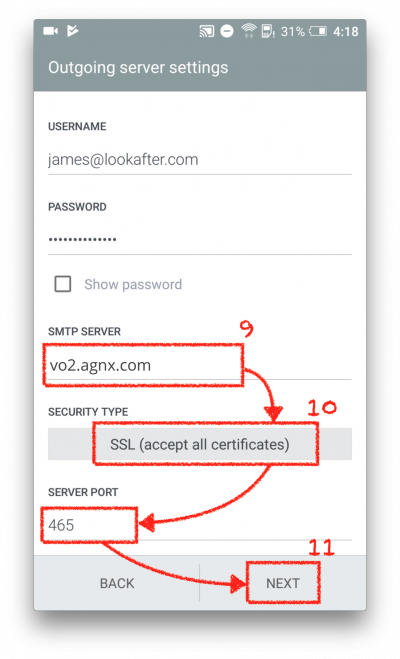
9. On the “Outgoing server settings” screen, enter Enter your mail server into “SMTP SERVER”: vo1.agnx.com / vo2.agnx.com / v1.agnx.com / g1.agnx.com
*IMPORTANT: Please consult AfterOffice Support to confirm which server to be used for your domain.
10. Select SSL (accept all certificates) as the “SECURITY TYPE”, and make sure the port number is 465.
11. Then, click NEXT.
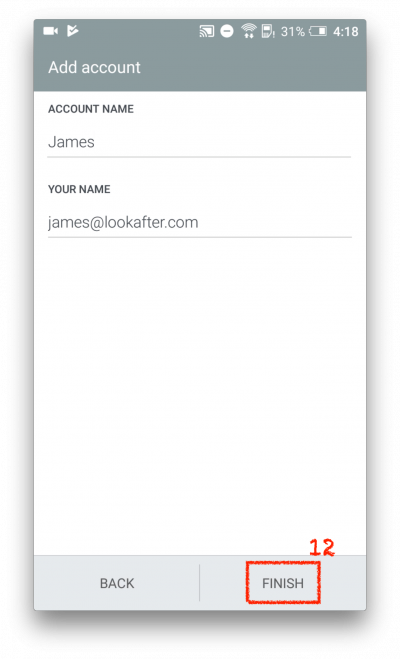
12. Click FINISH.
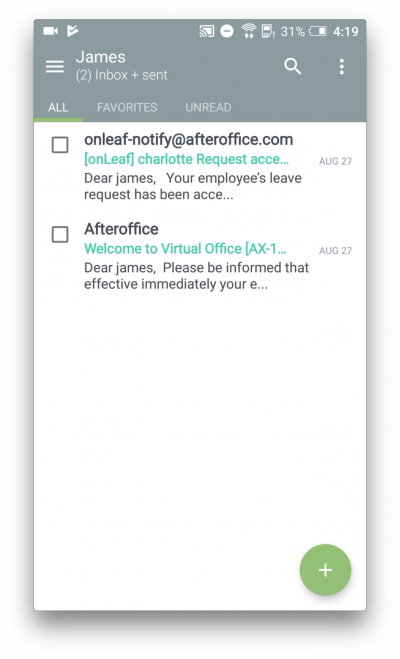
13. The setup is complete, and your emails will be synchronized to your phone.
