Email Setup Guide for Android Blue Mail App (Secure IMAP)
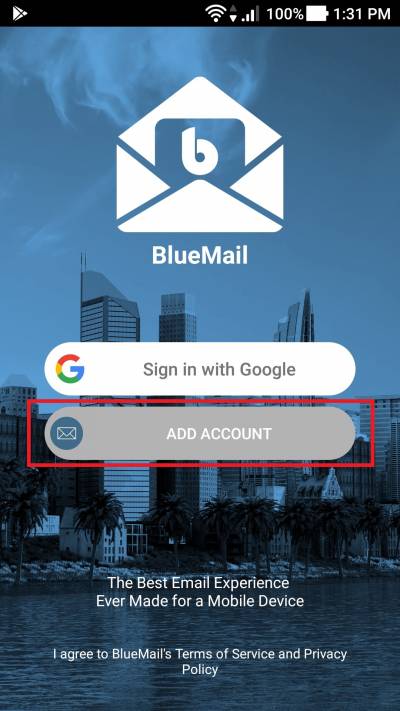
1. Click on the Blue Mail App.
2. Proceed with [Add Account].
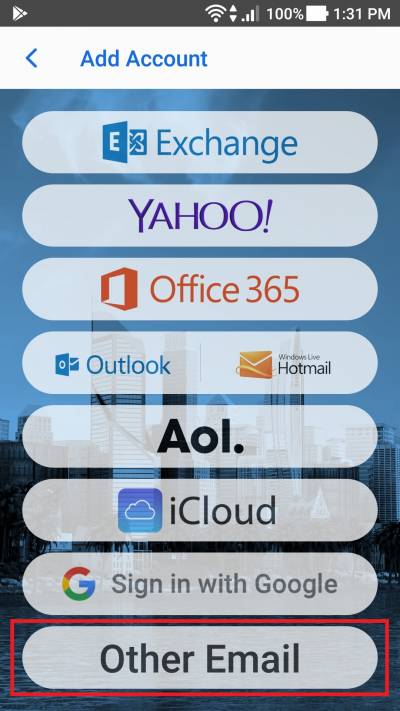
3. Select [Other Email].
4. Fill in your email address and password. Uncheck the Automatic box and click on [Next].
5. Select [IMAP].
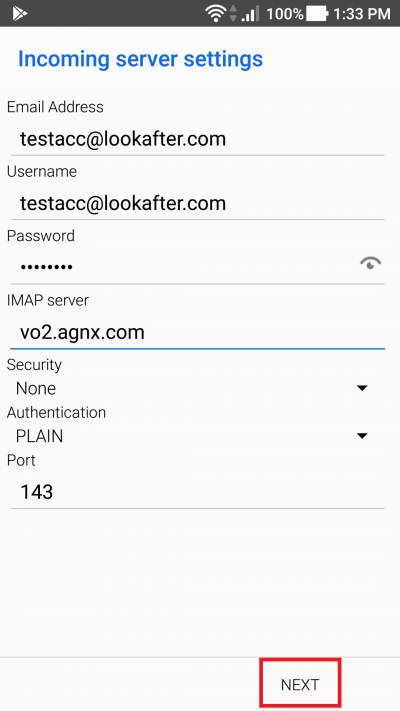
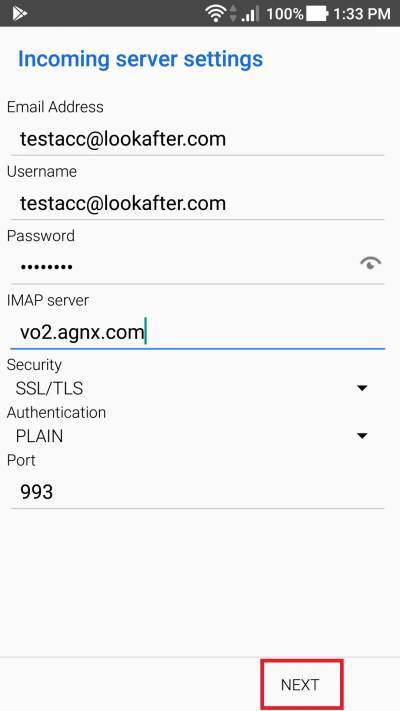
7. You can use these details to fill in the server settings:
Incoming mail server:
(I) For None or STARTTLS Encryption
| Email Address | Your full email address |
| Username | Your full email address |
| Password | Your password |
| IMAP server | vo1.agnx.com / vo2.agnx.com / v1.agnx.com / g1.agnx.com *IMPORTANT: Please consult AfterOffice Support to confirm which server to be used for your domain. |
| Security | None or STARTTLS |
| Authentication | Plain |
| Port | 143 |
(II) For SSL/TLS Encryption
| Email Address | Your full email address |
| Username | Your full email address |
| Password | Your password |
| IMAP server | vo1.agnx.com / vo2.agnx.com / v1.agnx.com / g1.agnx.com *IMPORTANT: Please consult AfterOffice Support to confirm which server to be used for your domain. |
| Security | SSL/TLS |
| Authentication | Plain |
| Port | 993 |
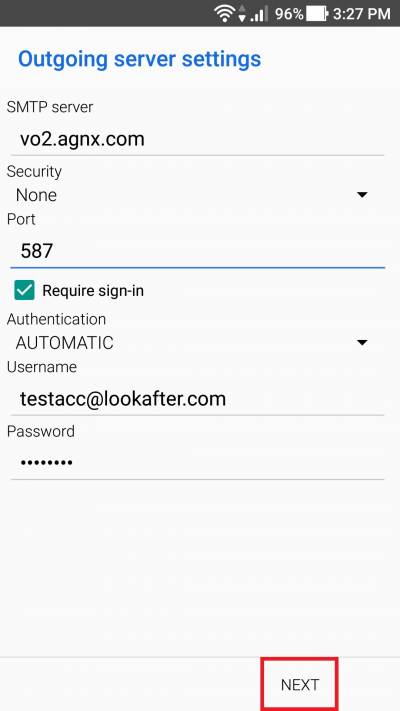
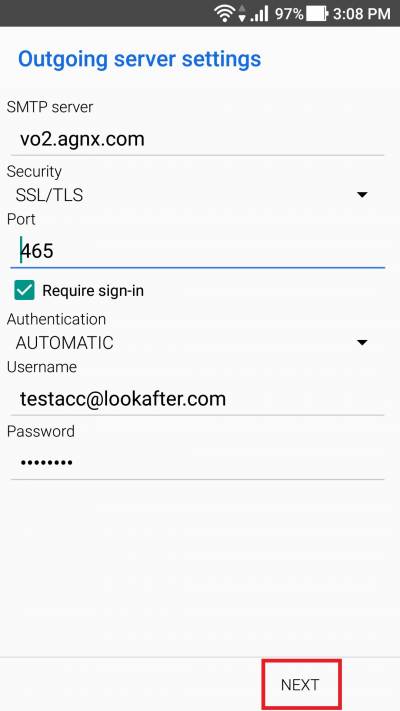
Outgoing mail server:
(I) For None or STARTTLS Encryption
| SMTP server | vo1.agnx.com / vo2.agnx.com / v1.agnx.com / g1.agnx.com *IMPORTANT: Please consult AfterOffice Support to confirm which server to be used for your domain. |
| Security | None or STARTTLS |
| Port | 587 |
| Require sign-in | Checked |
| Authentication | Automatic |
| Username | Your full email address |
| Password | Your password |
(II) For SSL/TLS Encryption
| SMTP server | vo1.agnx.com / vo2.agnx.com / v1.agnx.com / g1.agnx.com *IMPORTANT: Please consult AfterOffice Support to confirm which server to be used for your domain. |
| Security | SSL/TLS |
| Port | 465 |
| Require sign-in | Checked |
| Authentication | Automatic |
| Username | Your full email address |
| Password | Your password |
Please contact support@afteroffice.com to verify your mail server.
8. Click on [Next].
9. Fill in your name and the description. Then, click on [Done]. Finally, your mail account has been successfully created.

