faq:email:mail_setup_iphone
Email Setup Guide for iPhone/iPod (IMAP)?
The following screenshots will assist you with setting up your mailbox with your iPhone using IMAP.
- Select Settings from your iPhone home menu.
- Select Mail, Contacts, Calendars.

- Select Add Account…

- Select Other.
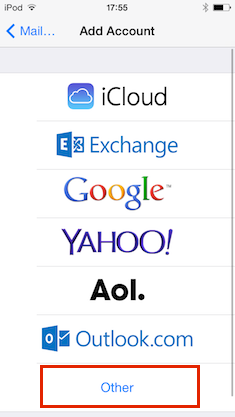
- Select Add Mail Account.
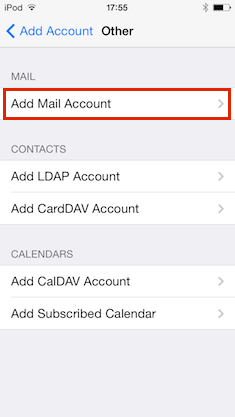
- Fill in the given fields regarding your email address information.
Click Next to continue.
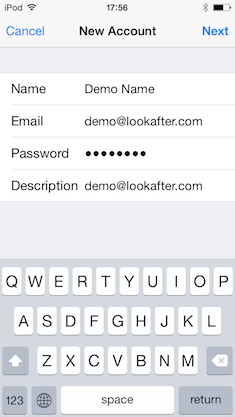
- Select IMAP as the option. Fill in the given fields.
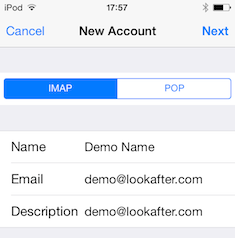
Make sure that the user name is your full email address.
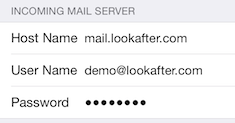
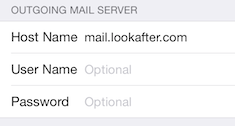
The host name for both incoming and outgoing mail server are the same, which is mail.[yourdomain.com].
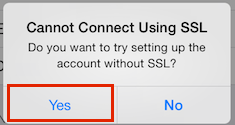
- On the attempt to verify your account, you will receive the message “Cannot Connect Using SSL - Do you want to try setting up the account without SSL?”. Select YES.
After 1-2 minutes you will receive the exact same message, Select YES again. After the 2nd time you will get all check marks.
- Mail should be set to ON and Notes should be set to OFF. Select Save.
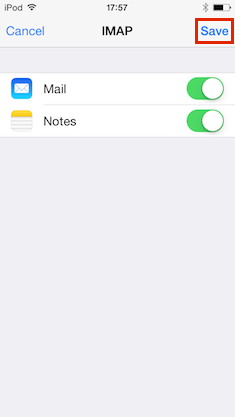
Before you further proceed, please check on the following advanced settings.
SMTP SETTINGS
- To further configure your mail settings, go to Settings > Mail, Contacts, Calendars and select your email account.
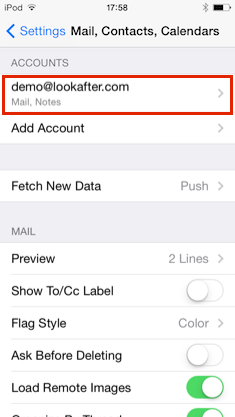
- Select your IMAP account.

- Under Outgoing Mail Server, tap into the SMTP settings.
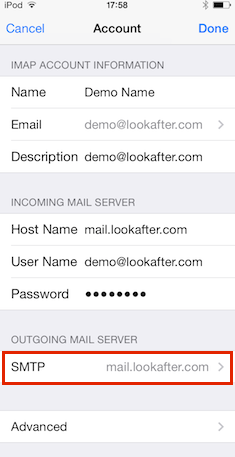
- Click onto your primary server.
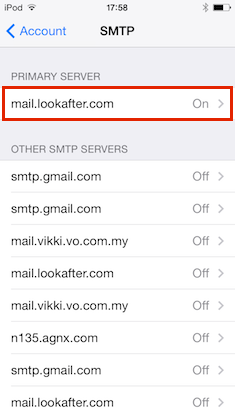
- Tap on Authentication.
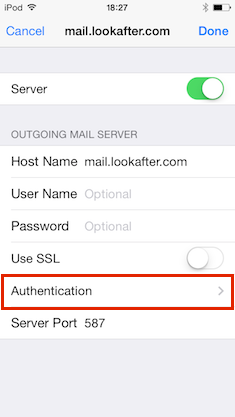
- Select Password as your authentication method.

- Now, fill in your username and password in the given fields. Make sure that the server port is 587.
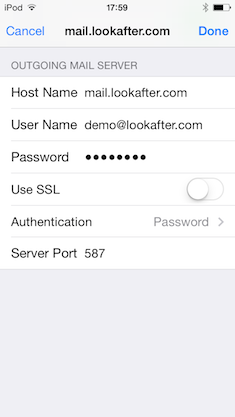
Click Done to save the settings.
ADVANCED SETTINGS
- Now, let's proceed to the Advanced settings.
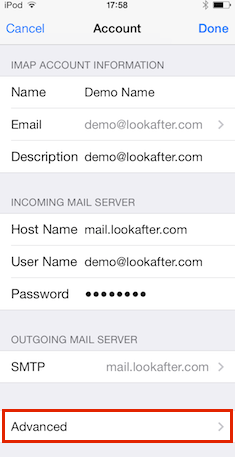
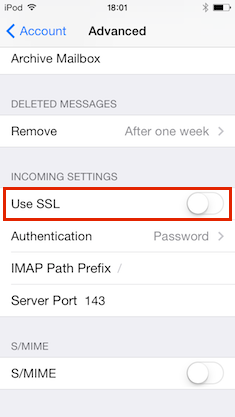
- Scroll down the page. Turn off the Use SSL option.
- Remember to click on Done to save all your configurations.
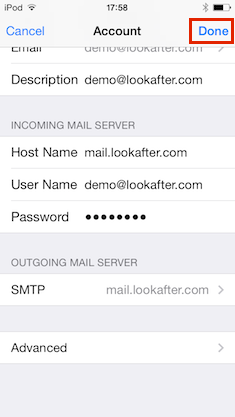
Congratulations you have successfully setup your mailbox to use IMAP on your iPhone.
faq/email/mail_setup_iphone.txt · Last modified: 2015/07/28 16:01 by vikki

