This is an old revision of the document!
Table of Contents
How to customize and use the free AfterOffice Contact Form?
In this article, you will be guided on how to setup AfterOffice contact form and enable it on your website. There are several steps involved:
1. Downloading and extracting the form
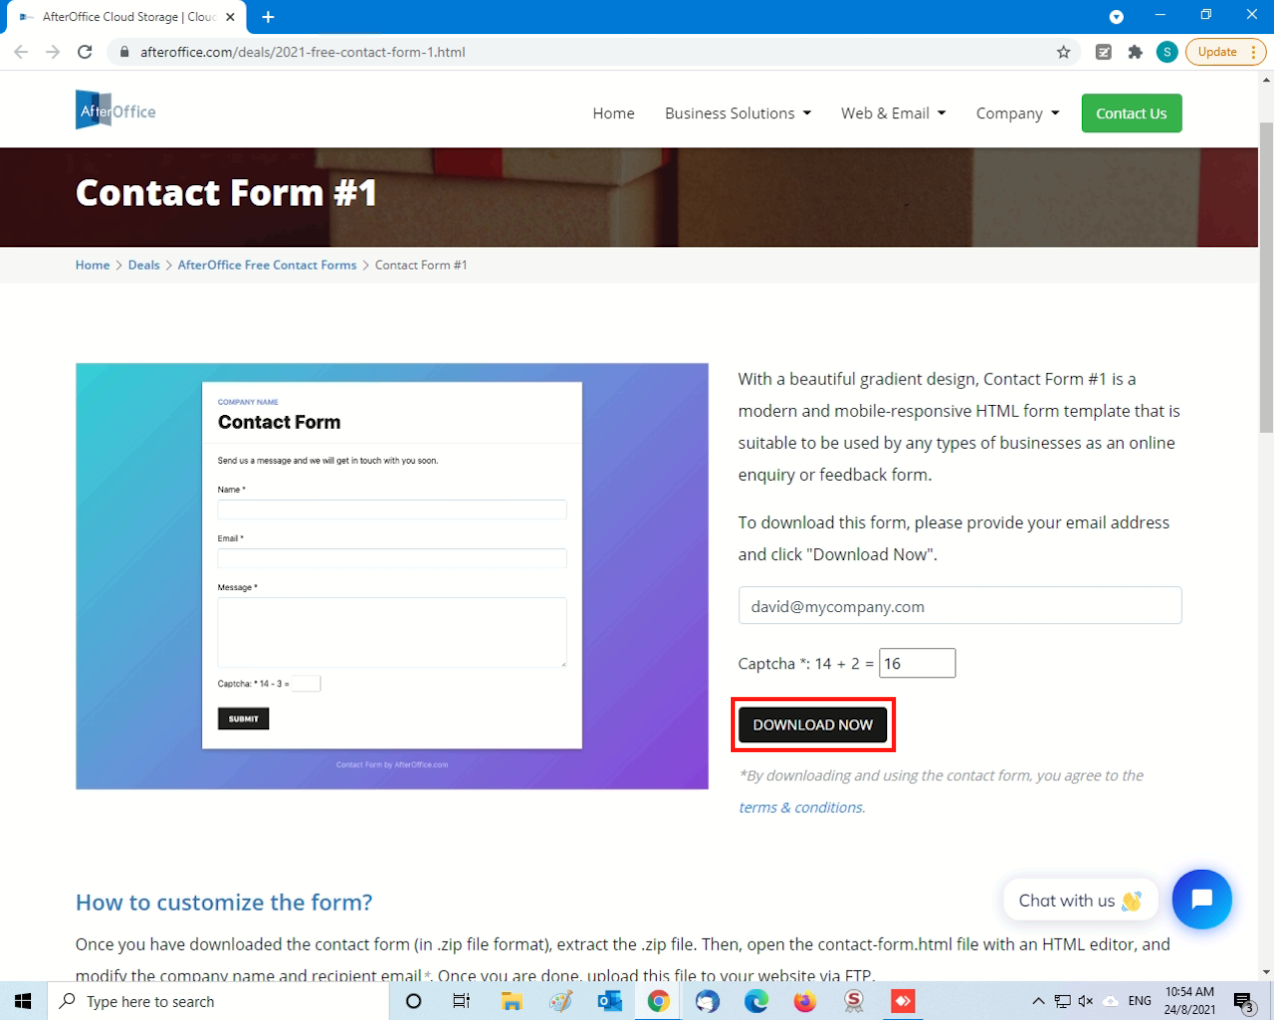
Once you have decided which form you want to use, enter your email address and the correct answer for the captcha, and click [DOWNLOAD NOW].
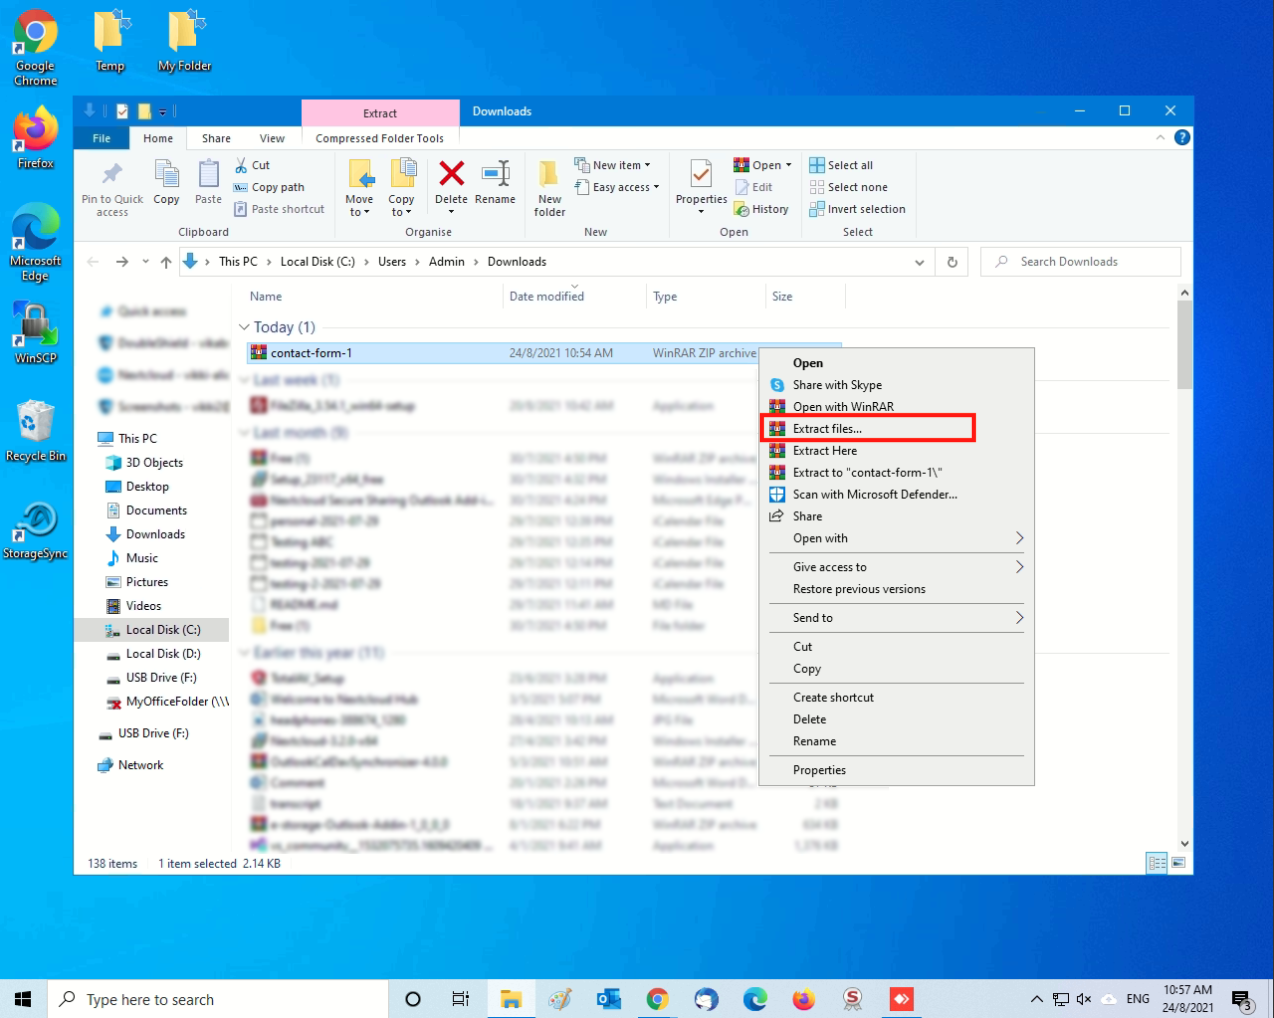
The contact form will be downloaded in .zip file format. Extract this zipped file.
You will find two files within the extracted folder:
- contact-form.html: This is the main file that displays the contact form.
- thank-you.html: This file is used to display the thank you message once a form has been successfully submitted.
Now, let's move on to the next step to see how we can customize the form.
2. Customizing the form
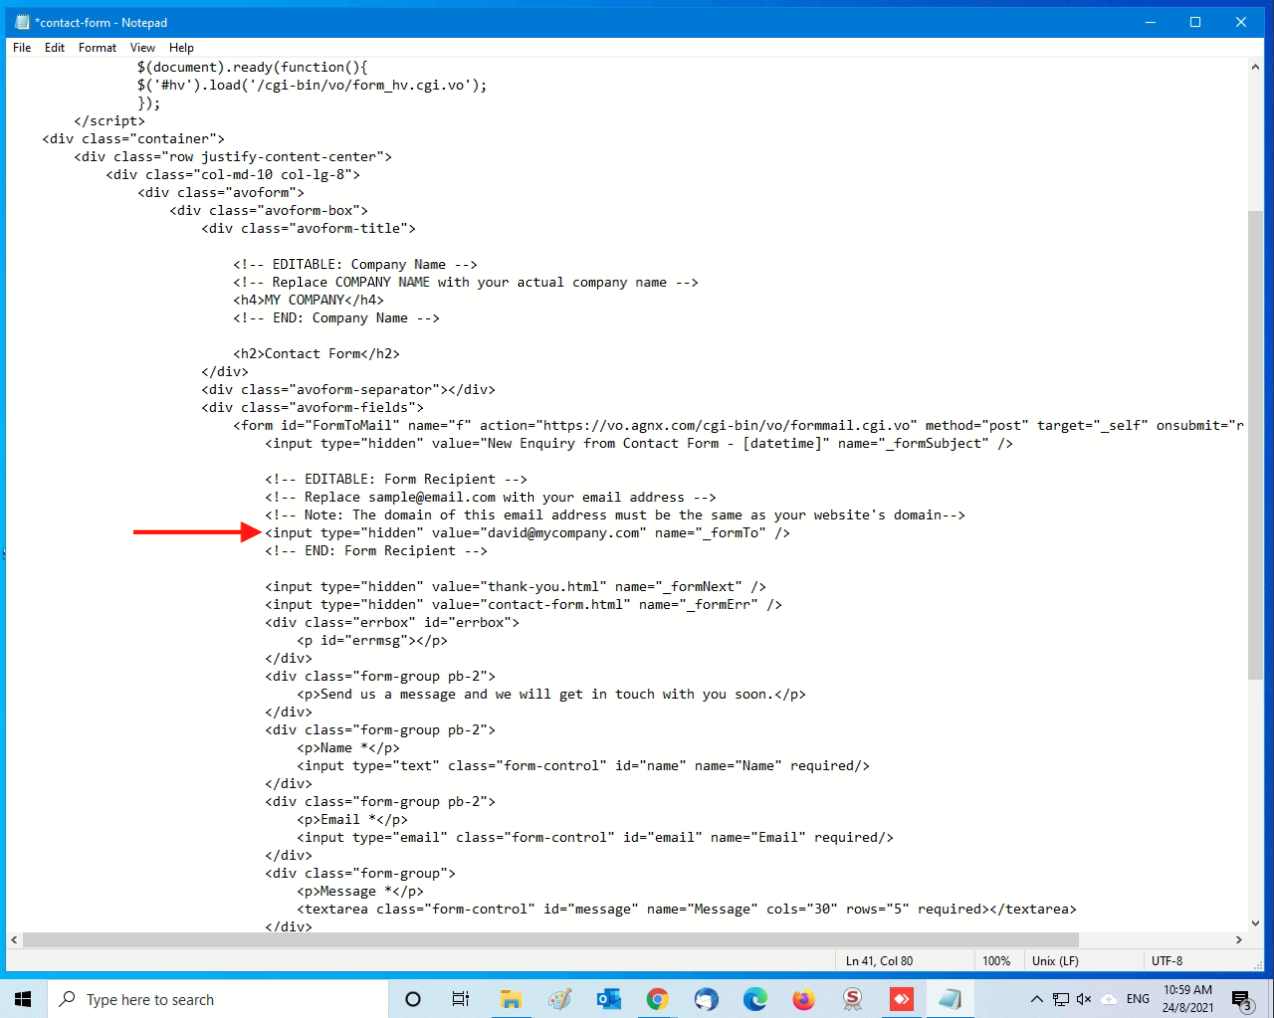
Open the contact-form.html file with a HTML editor or Notepad.
The first item to customize is the company name displayed on the form. Within the editor, look up for this line: <!– EDITABLE: Company Name –> where you will see <h4>COMPANY NAME</h4>.
Replace COMPANY NAME with your actual company name.
Next, we will modify the recipient email address. This recipient email address will be the one who receives all the form submissions. Look for: <!– EDITABLE: Form Recipient –> and you will see <input type=“hidden” value=“sample@email.com” name=“_formTo” /> after a few lines.
Replace sample@email.com with your desired email address. Note that this email address must have the same domain as your website's domain. For example, if your website is mycompany.com, then the email address must be xxx@mycompany.com (where xxx is any valid username).
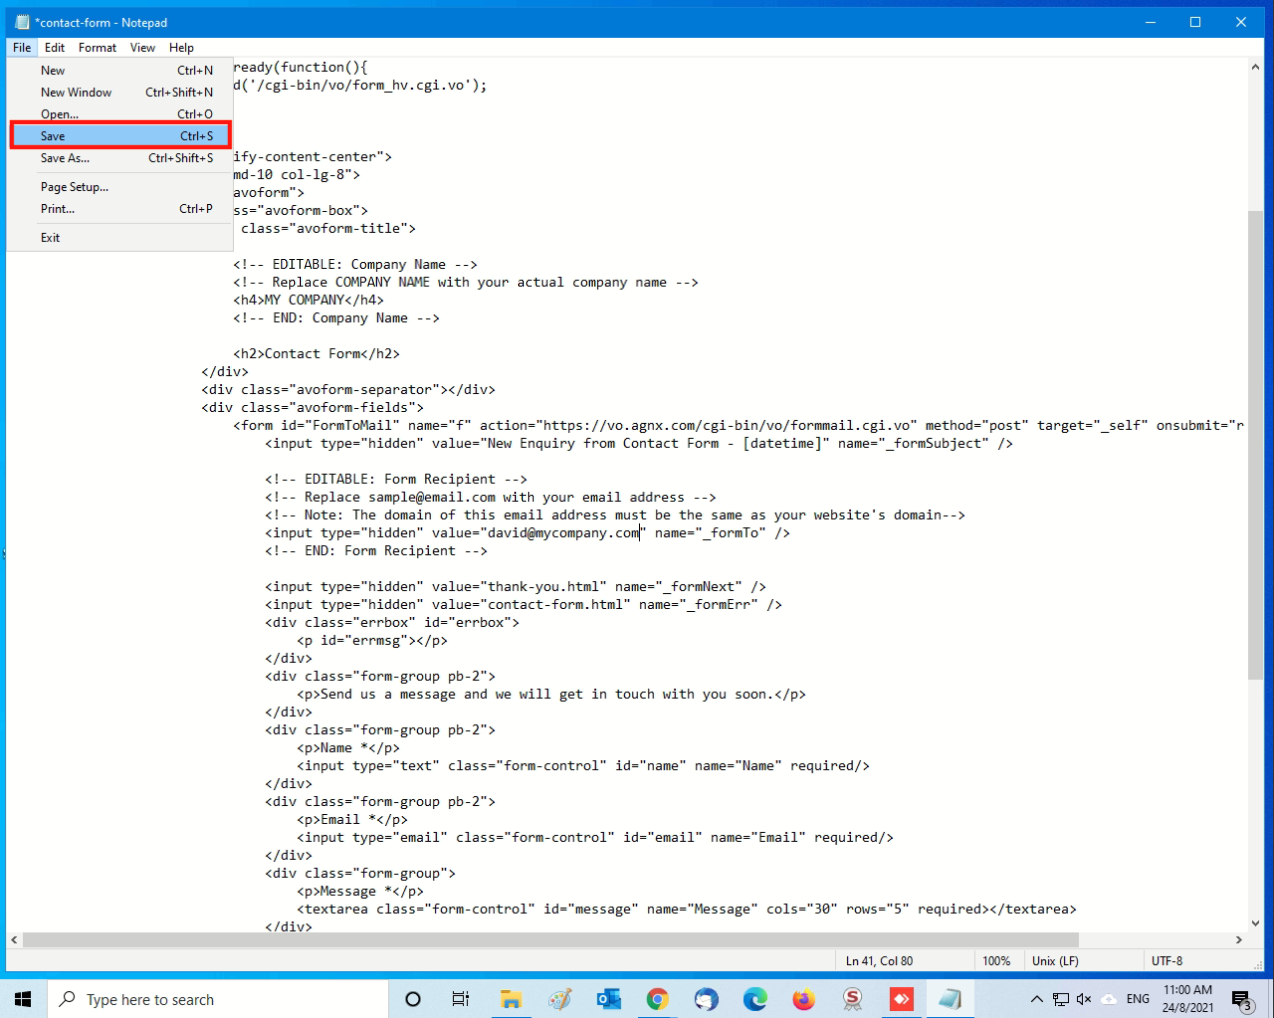
Once you have done the customization, don't forget to save the file.
3. Uploading the form to your website
Now that the contact form is ready, let's upload it to your website. Before we proceed, make sure you have the following ready:
- An FTP client (e.g. FileZilla) installed on your PC
- Your website FTP login details (How to get this info?)
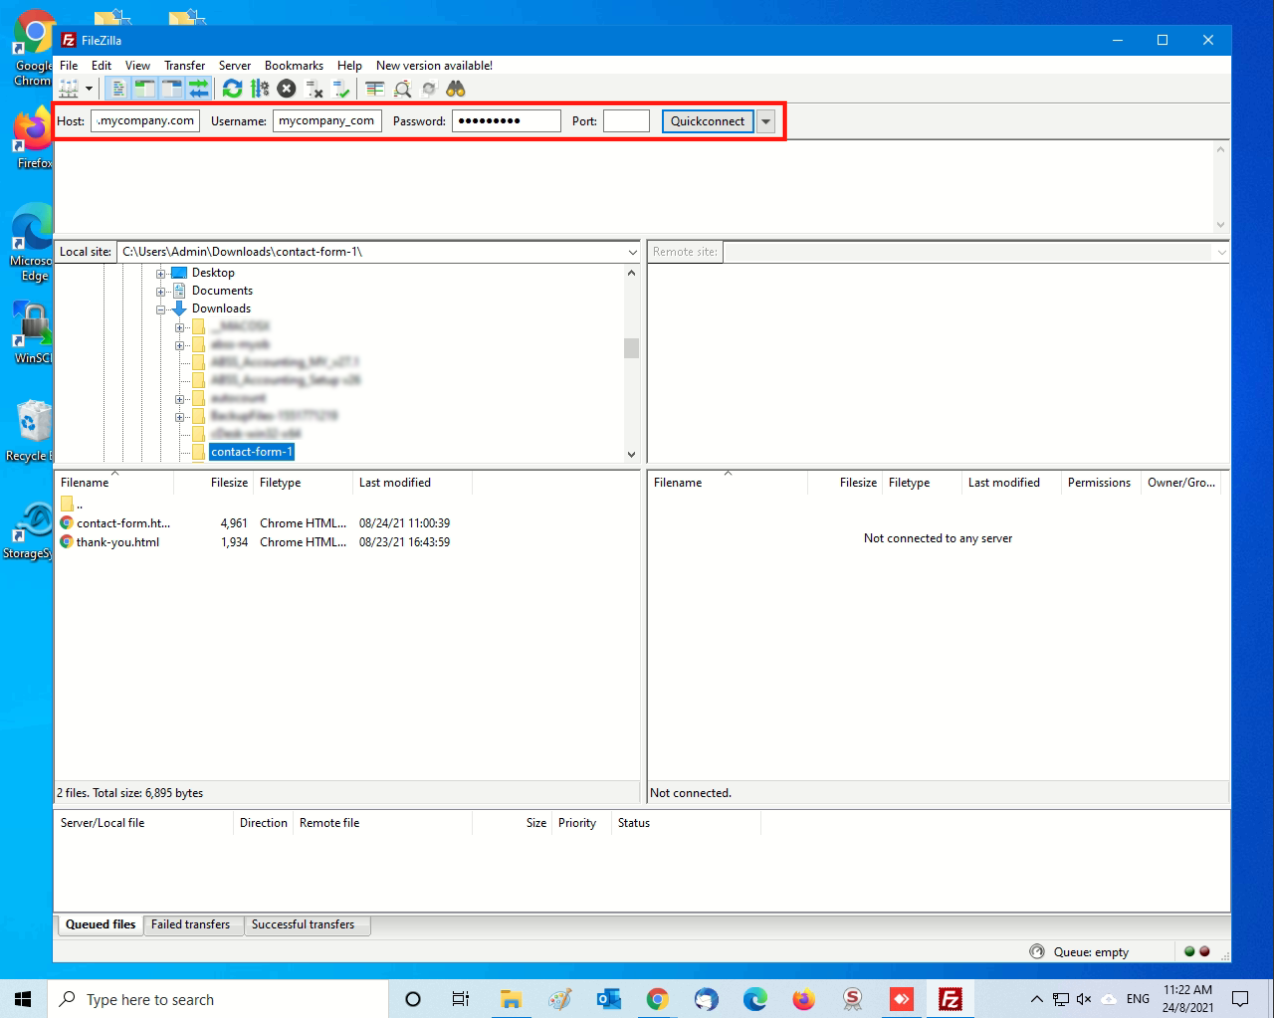
Once you have the above details ready, launch the FTP client on your PC. Enter the host, FTP username and password, and connect.
You may get a certificate warning. If the certificate is *.agnx.com, select “Always trust certificate in future sessions” and click [OK].
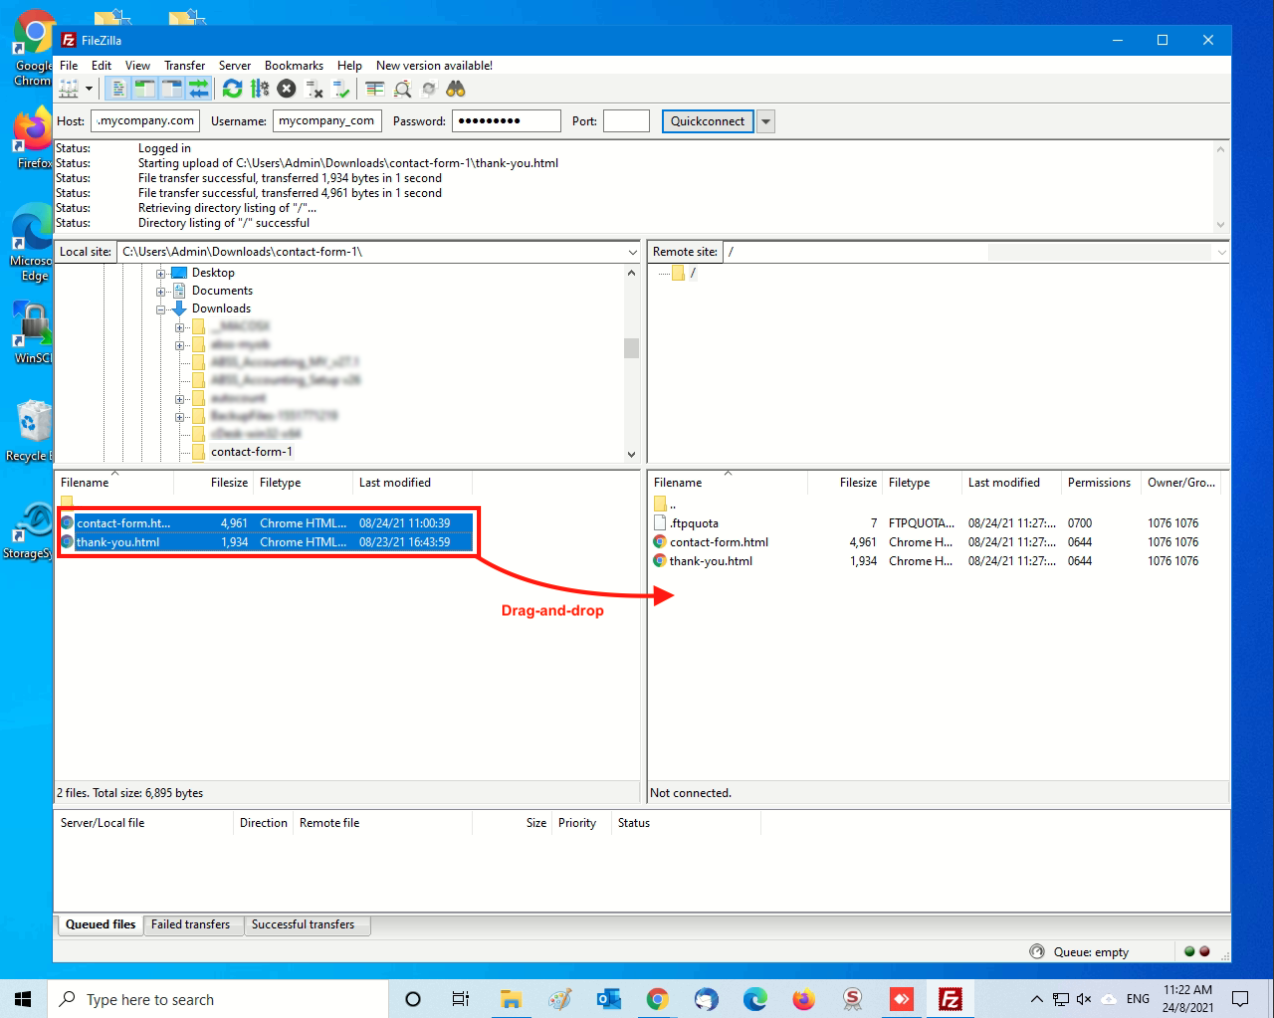
Once you have connected to your web server via FTP, upload the updated contact-form.html. You can simply drag the file and drop it to the remote container.
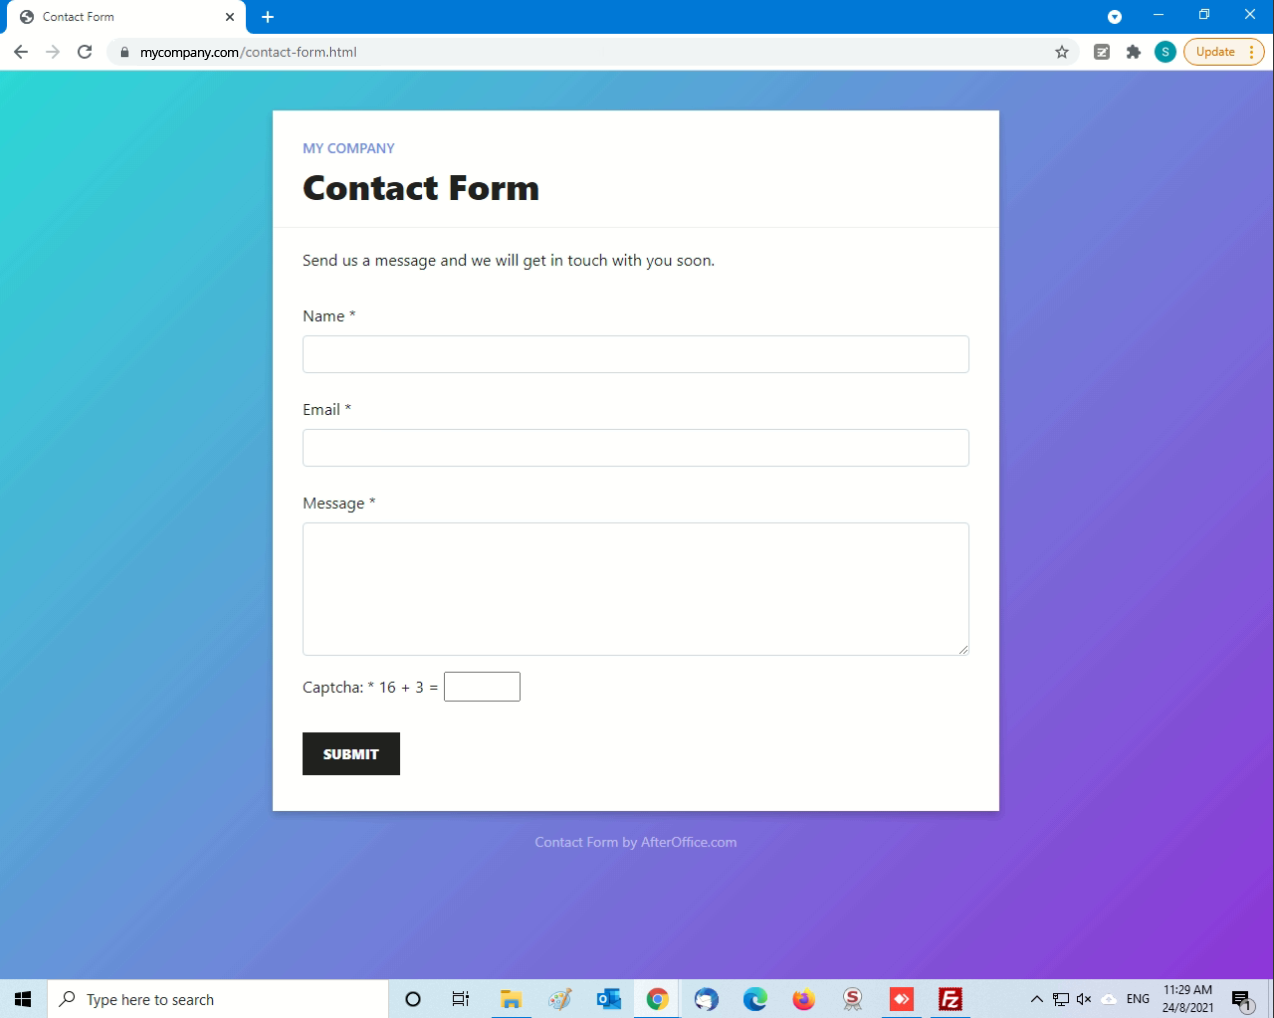
Once the file has been uploaded successfully, you can access this contact form via yourdomain.com/contact-form.html (where youdomain.com is your website domain).

