Table of Contents
Choose Specific IMAP Folders from Webmail to Appear in Email Client
If you are using IMAP to connect to your email account, you may only see your Inbox folder and no other folders you may have set up in your webmail. In this case, an IMAP folder list can be downloaded where you can then select which folders to view in your email client.
MS Outlook 2013, 2016
- Open MS Outlook.
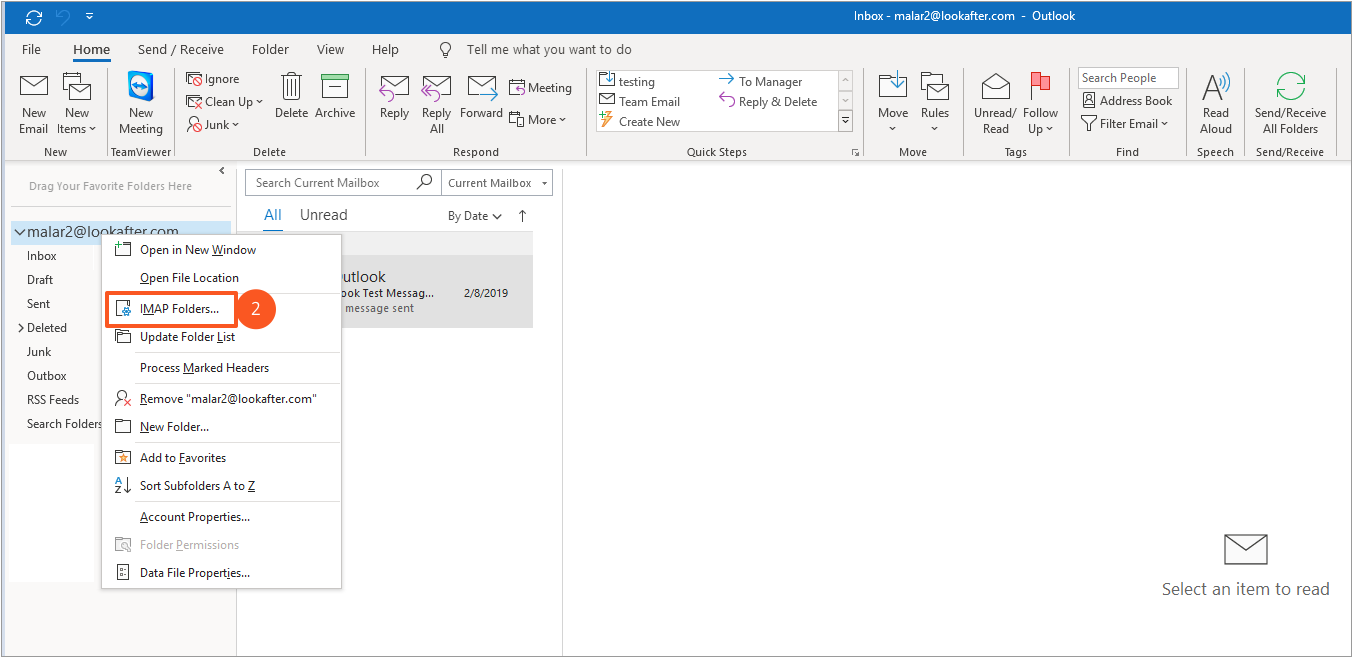
- In the left navigation pane, right-click the top folder for your IMAP account, and select [IMAP Folders].
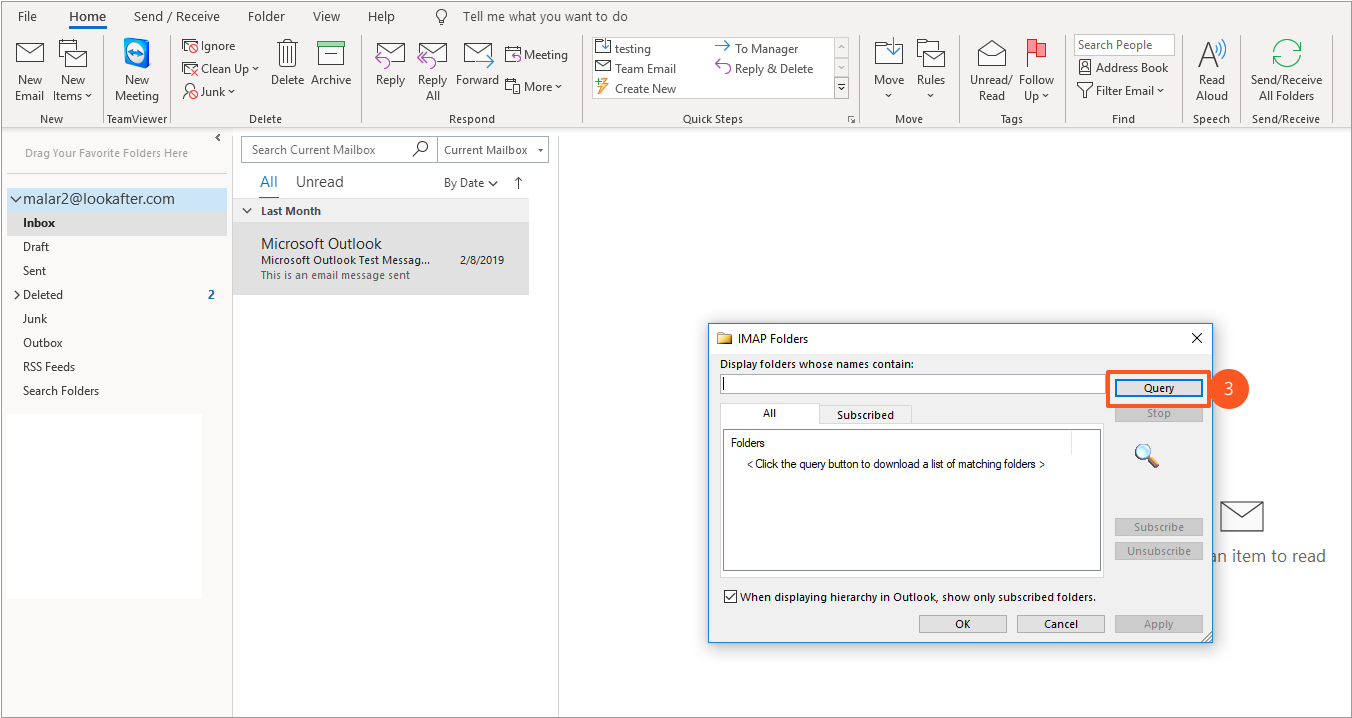
- Then, click [Query] to load your webmail folders.
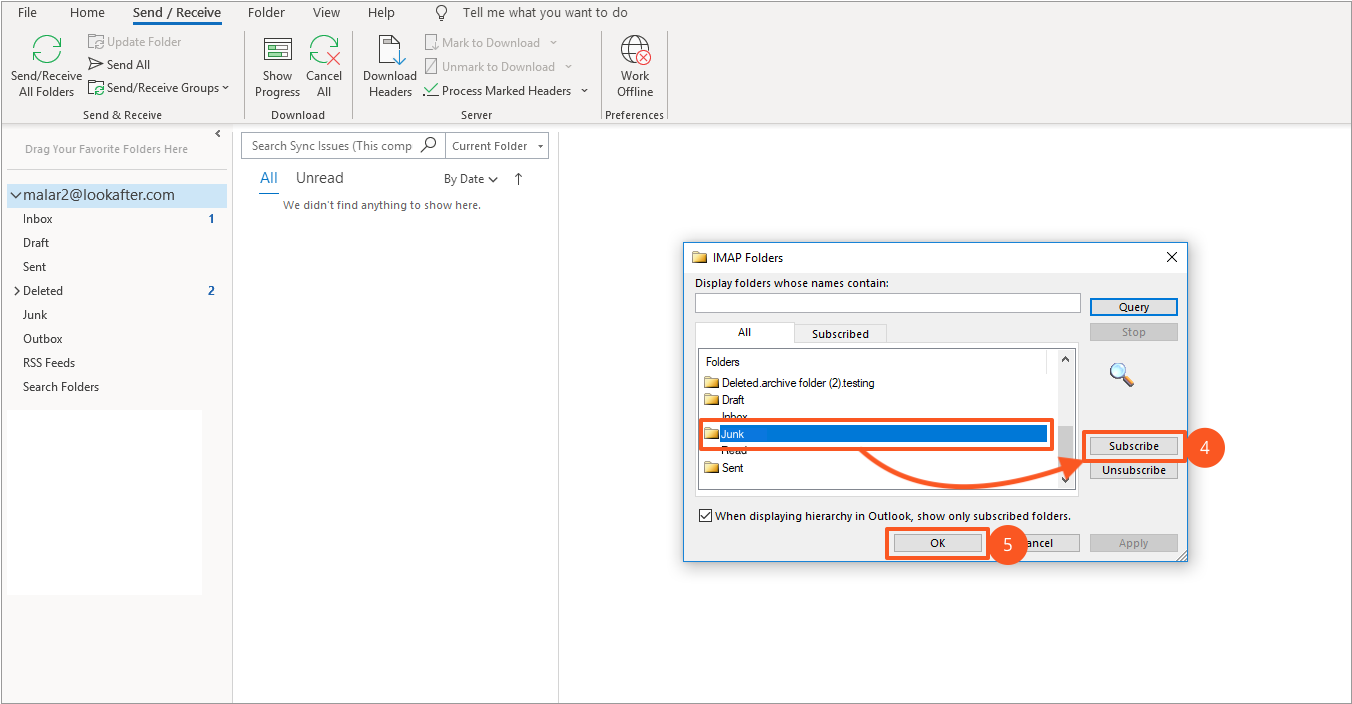
- Next, select the folder you wish to subscribe, and click [Subscribe].
If you want to select multiple folders, press and hold the Ctrl key as you select multiple folders. - Click [OK] after you have done subscribing the desired folders.


The newly subscribed folders should now appear in the folder list of your email account.
Outlook 2011
- Open Outlook.
- Go to the [Tools] menu on the application toolbar and choose [IMAP Folders].
- Select the folder you would like to subscribe to and click [Subscribe].
- Click [OK].
The newly subscribed folders should now appear in the folder list of your email account.
—————————
MS Outlook 2010
- Open MS Outlook.
- Go to the Tools menu on the application toolbar and choose IMAP Folders.
- Click Query.
- Select the folder you would like to subscribe to and click Subscribe.
- Click OK.
The newly subscribed folder should now appear in the folder list of your email account.
Mac Mail
For latest versions of Mac OS (High Sierra, Mojave), the custom IMAP folders will be displayed automatically on your Apple Mail App. If you are using an older version of Mac OS and Apple Mail app, try the following steps:
- Launch Mac Mail.
- From the Mail Menu, select [Preferences] and then [Accounts].
- Highlight your email account and click the [Advanced] tab.
- Place a check next to the option to [Automatically synchronize changed mailboxes].
- Close Preferences and save the changes when prompted.
- Quit Mac Mail and relaunch the application.
If your mailbox list is not showing, open the View menu and choose Show Mailboxes and click on the right-pointing triangle to the left of your account heading to reveal your IMAP folders.
Thunderbird
- Open Thunderbird.
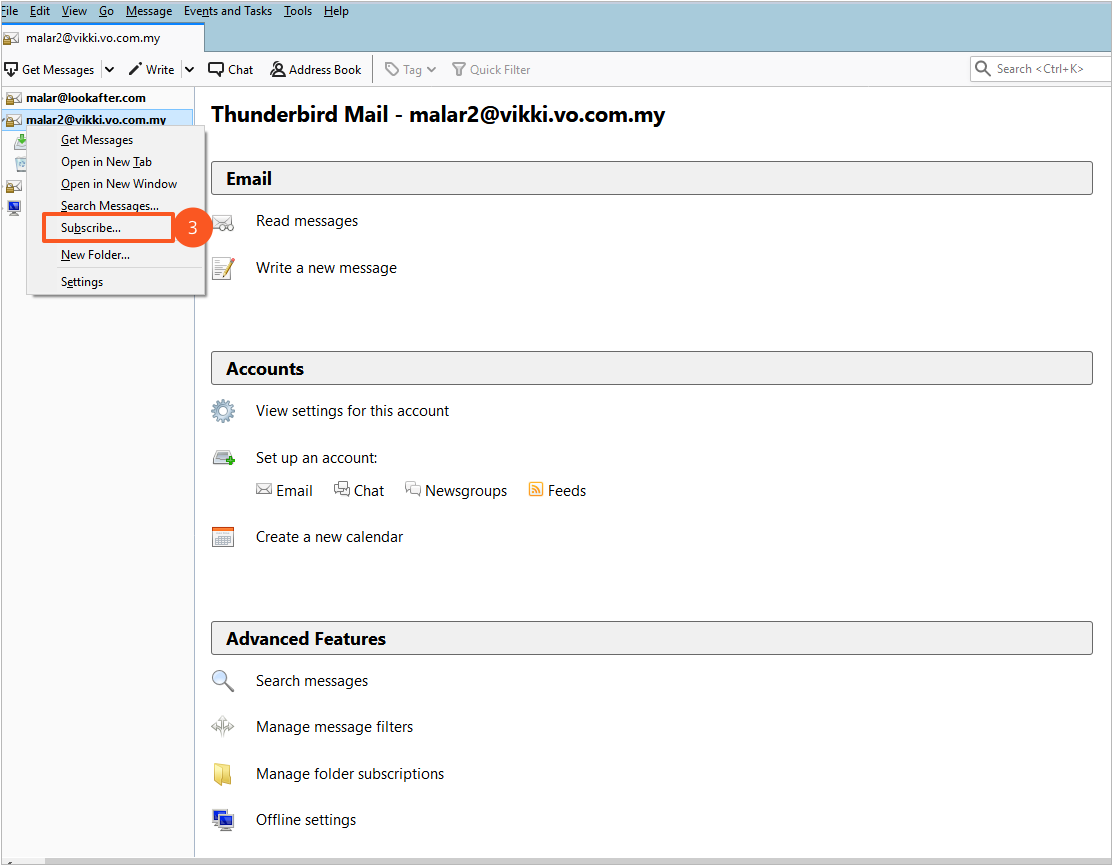
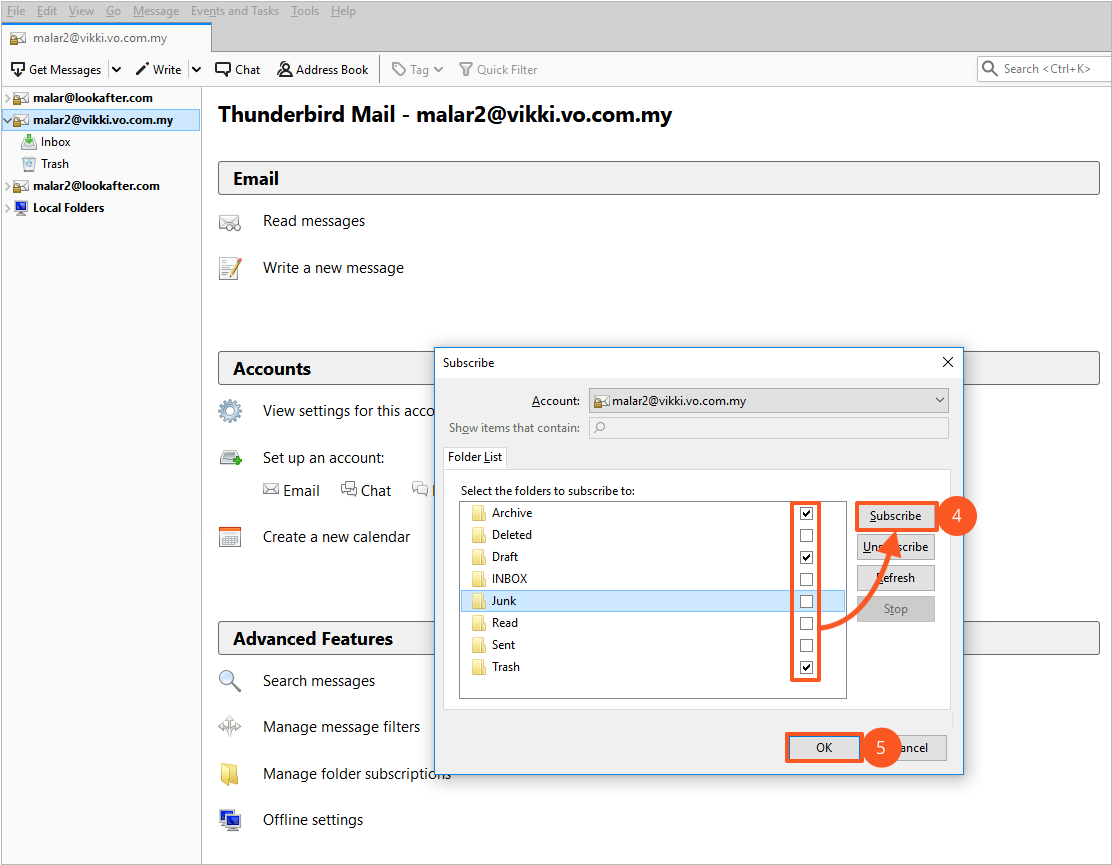
- Highlight the appropriate IMAP account name in the left margin for configuring subscribed folders.
- Right-click (Windows) or Ctrl-click (Mac) the account name to select [Subscribe].
- Select the folder(s) you wish to subscribe to and choose [Subscribe].
- Click [OK] to save the changes and exit the manage folder subscriptions window.
- Close Thunderbird and relaunch the program.


A list of your subscribed IMAP folders should be displayed.
Reference taken from: OIT Help
