Table of Contents
How to 'switch' POP3 to IMAP mail account in Microsoft Outlook
As you know, POP3 protocol will only download the emails from your webmail's Inbox and the emails are not synchronised with your mail account in other devices. For your convenient, you may consider switching your mail account to IMAP if you wish to access your all your emails anywhere and anytime.
There are four simple steps to setup your POP3 account to IMAP. Firstly, backup your emails to avoid any missing emails during the procedures. Next, remove the POP3 mail account from the account settings. Then, proceed to create your IMAP account. Lastly, you may choose to restore your backup emails in the current IMAP account. However, please ensure that you have sufficient email storage before you continue with the restoration.
For detailed guidelines, please refer the steps below for your mail account configurations:
Backup your email
First, you must backup your emails to prevent any email loss during the process by referring the steps below:
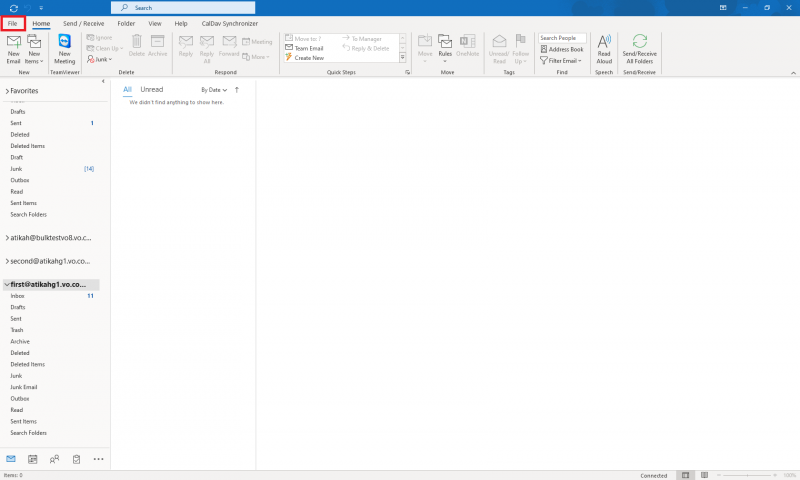
1. Open Microsoft Outlook. Then, go to [File].
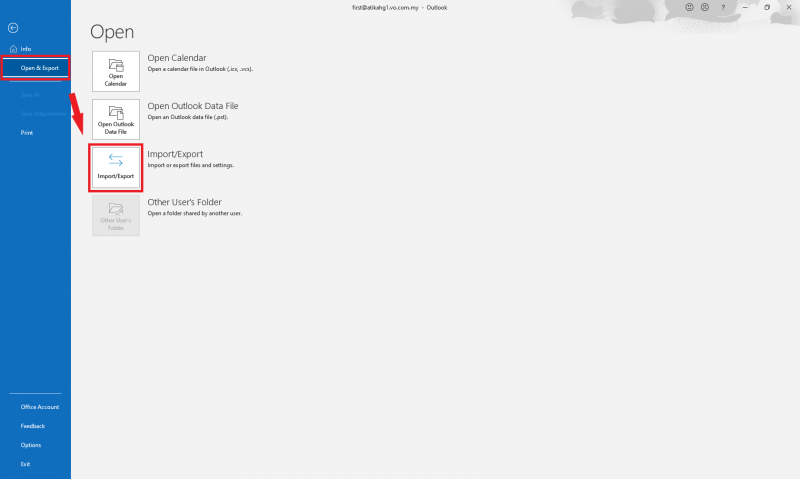
2. Next, go to [Open & Export] and [Import/Export].
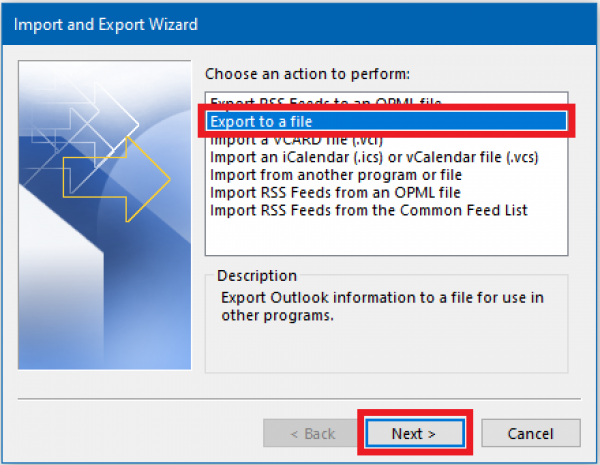
3. Choose [Export to a file] and click [Next].
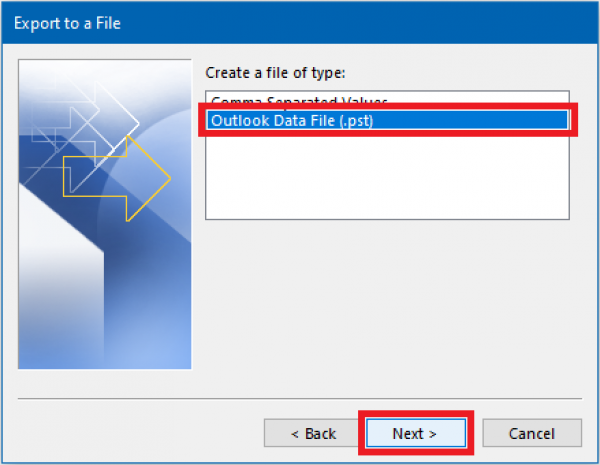
4. Create the [Outlook Data File (.pst)] and click [Next].
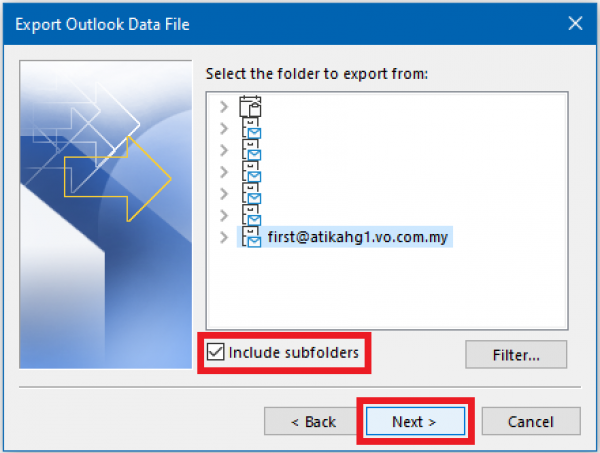
5. Select your mail account and tick the [Include subfolders] option. Then, click [Next].
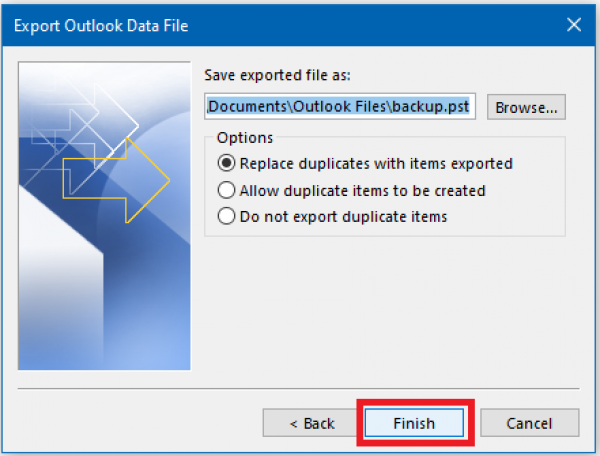
6. You may click [Browse] and type the file’s name. Or, you can just use the ‘backup.pst’ file. You can select ‘Replace duplicates with items exported’ and proceed to [Finish].
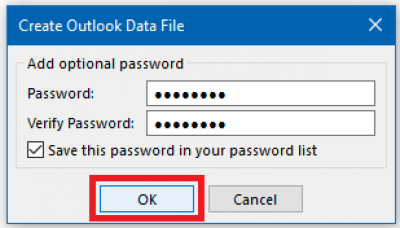
7. Fill in the password for your backup emails then click [OK].
8. Now, all your emails have been backup to your local document in pst format.
Remove your POP3 mail account
After your emails have been backup, you can proceed to remove the POP3 mail account. Below are the steps involve to remove your account:
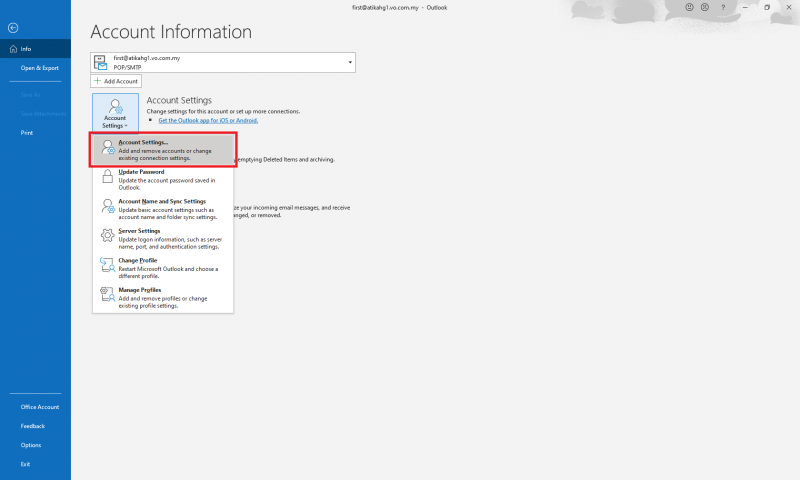
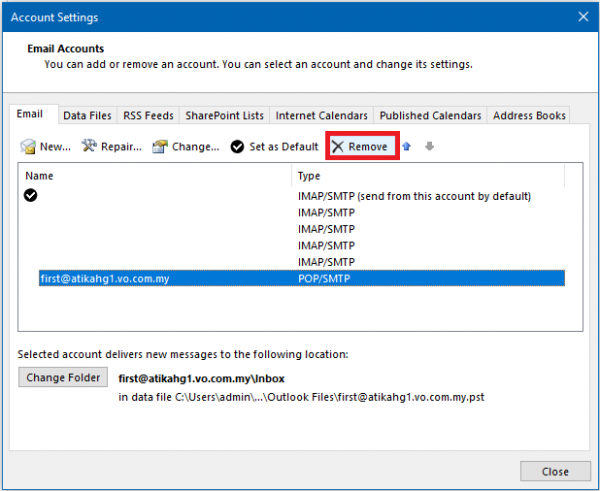
1. Go to [File] > [Account Settings] > [Account Settings].
2. Select your mail account and click [Remove].
3. Click on [Yes] to continue.
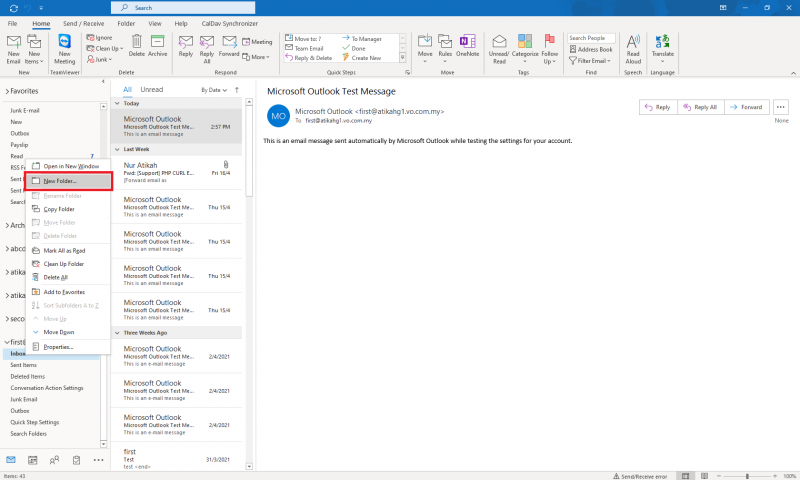
4. Before you close the POP3 mailboxes, create a new folder under your main folders. For example, add an “Old Inbox” folder under the Inbox. You may create this by right-click on the folder and select [New Folder]. Type in the folder's name in the blank space.
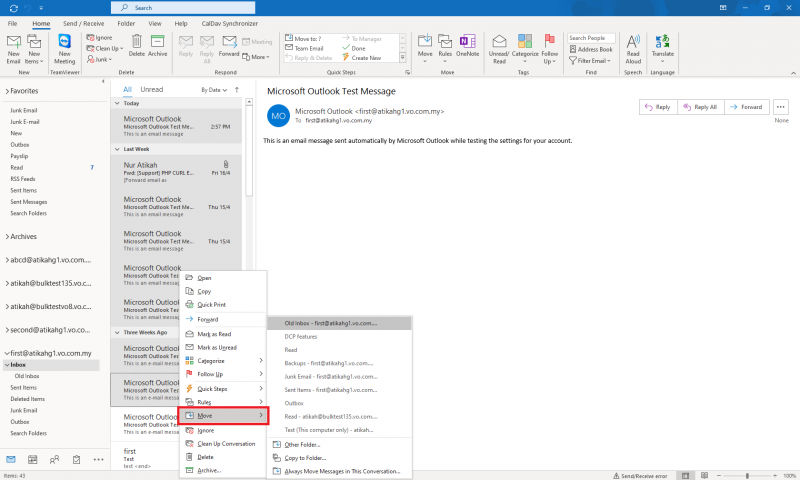
5. Next, move the emails that you wish to be restored to your IMAP account in this new folder. You may select the emails and right-click on them. Then, select [Move] to the new folder (eg Old Inbox)
6. Select [Yes].
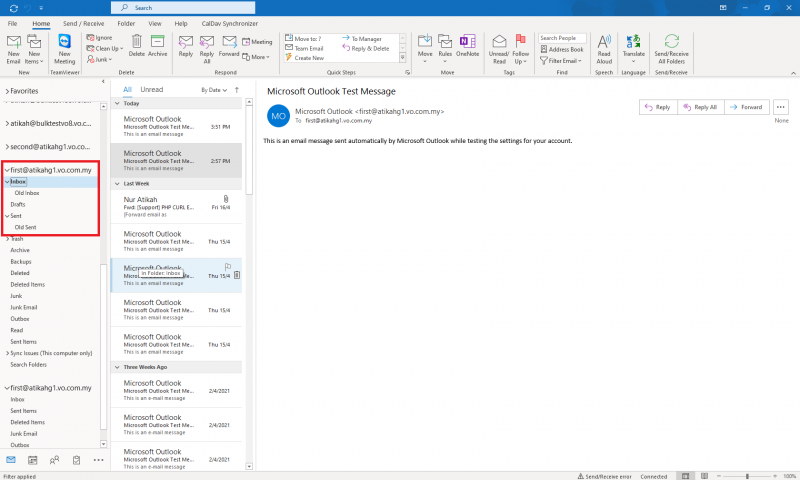
7. Here, you can see the new folders (Old Inbox and Old Sent) under the main folders.
Add your IMAP account
You may proceed to add the new IMAP account once you have removed the previous POP3 mail account by referring the link below:
Email Setup Guide: Microsoft Outlook (Secure IMAP)
Restore your mailbox
Please note that you must make sure that your email storage is sufficient to store all your emails if you want to move the backup emails in your new IMAP account. The following steps will guide you to restore your backup emails:
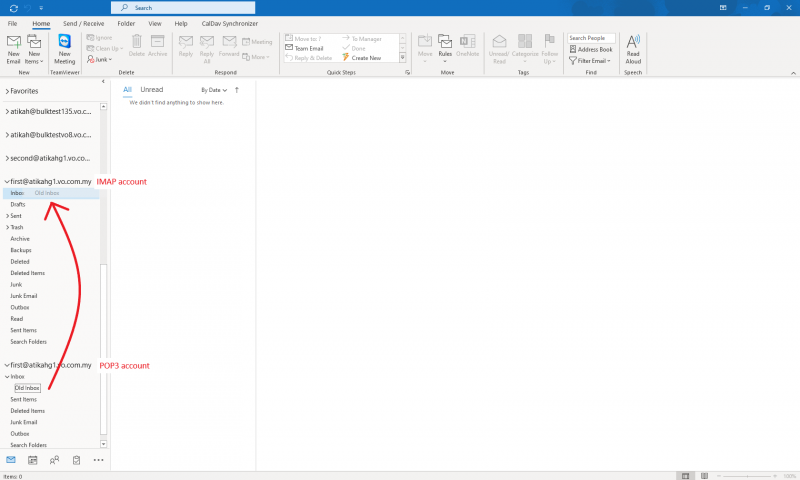
1. Select the new folder that you have created in your POP3 account such as “Old Inbox” and “Old Sent”. Then, drag and drop it under the IMAP folder. By doing this, you can separate the folder for new and old backup emails.
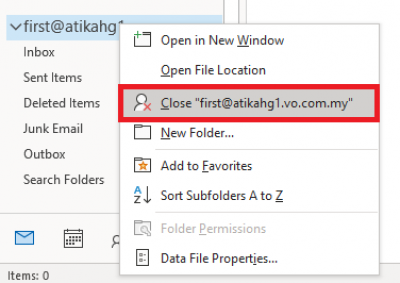
2. Repeat the step for all of the folders. After you have finished moving the emails, you may close the POP3 account by right-click on the account and select [Close].
You may expect longer synchronisation time in Microsoft Outlook if you have larger folder's size.

