This is an old revision of the document!
Table of Contents
How to 'switch' POP3 to IMAP mail account in Microsoft Outlook
Backup your email
You must backup your emails to prevent any email loss during the process.
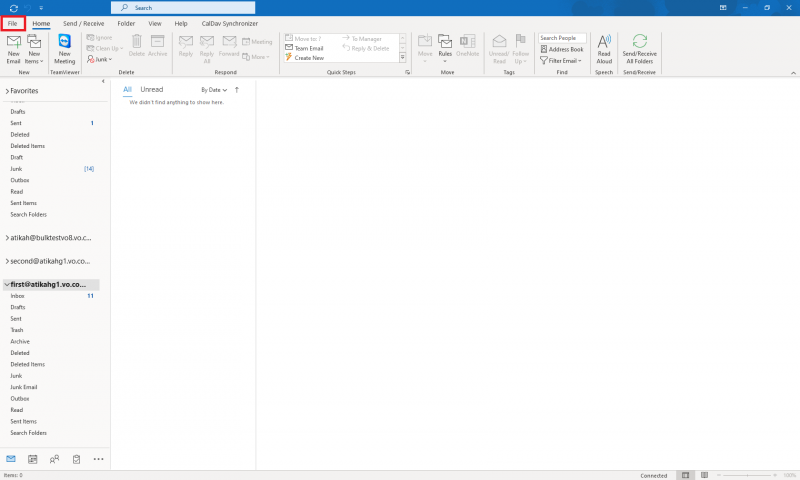
1. First, open the Microsoft Outlook. Then, go to [File].
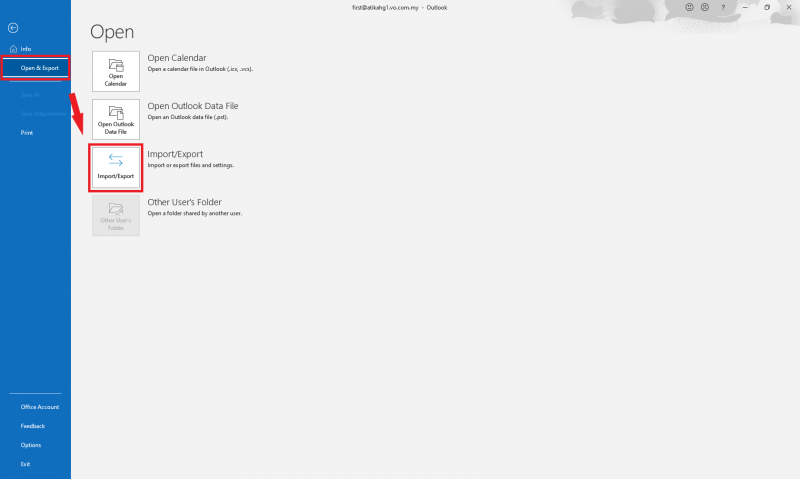
2. Next, go to [Open & Export] and [Import/Export].
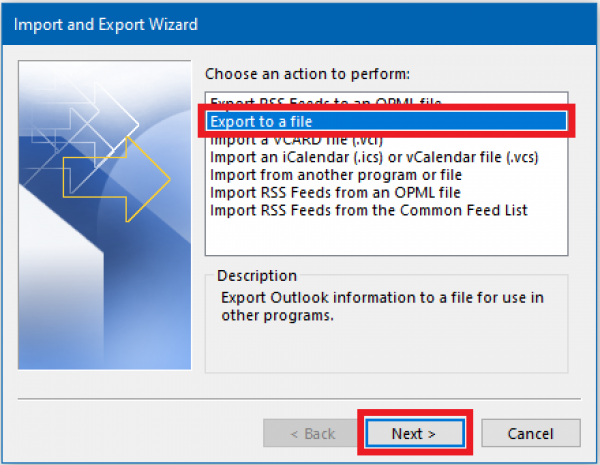
3. Choose [Export to a file] and click [Next].
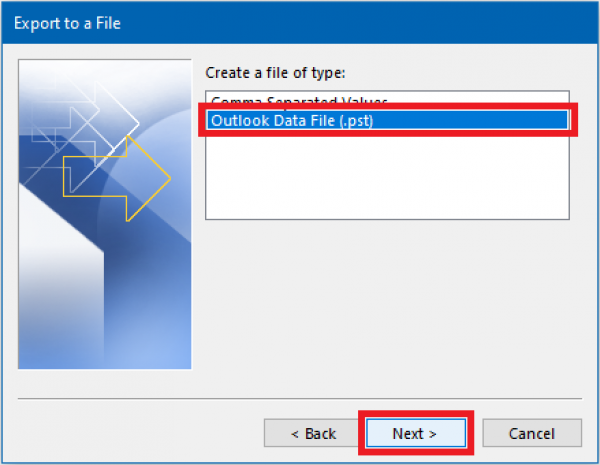
4. Create the [Outlook Data File (.pst)] and click [Next].
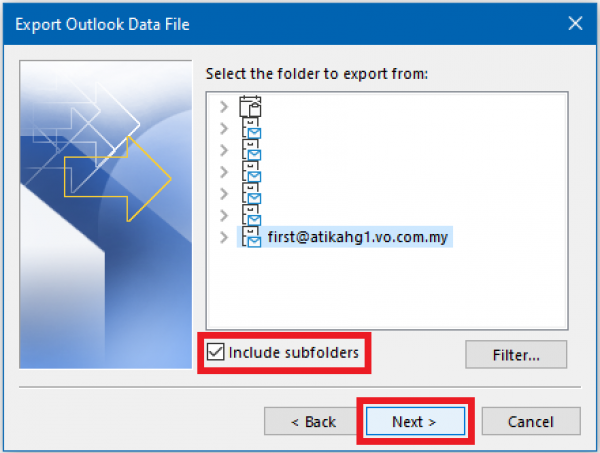
5. Select your mail account and tick the [Include subfolders] option. Then, click [Next].
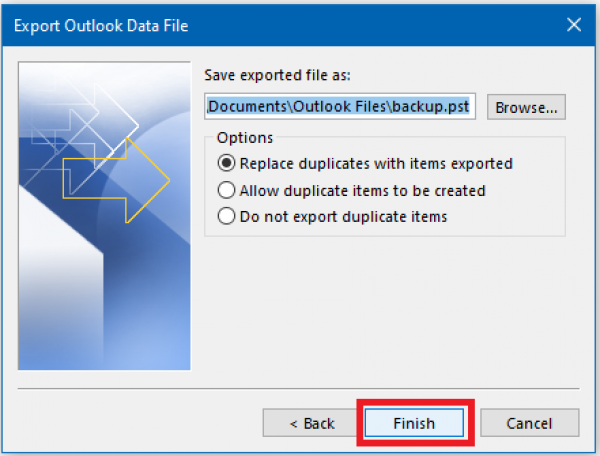
6. You may Click [Browse] and type the file’s name. Or, you can just use the ‘backup.pst’ file. You can select ‘Replace duplicates with items exported’ and proceed to [Finish].
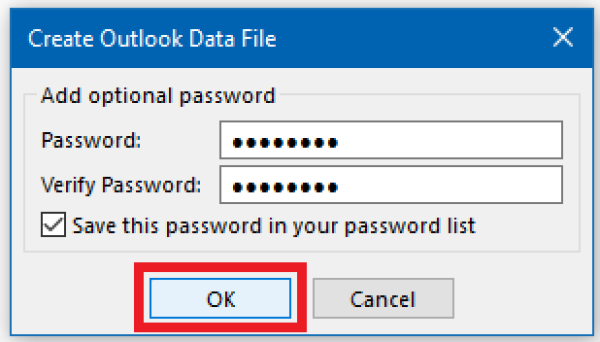
7. Fill in the password for your backup emails then click [OK].
8. To open the backup emails, you can go to [File] > [Open & Export] > [Open Outlook Data File].
9. Select your backup emails file and click [OK].
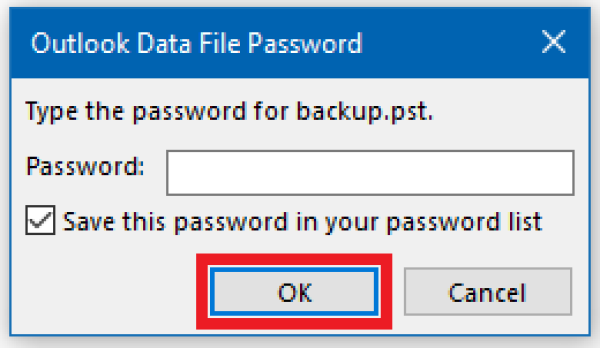
10. Fill in the password then click [OK].
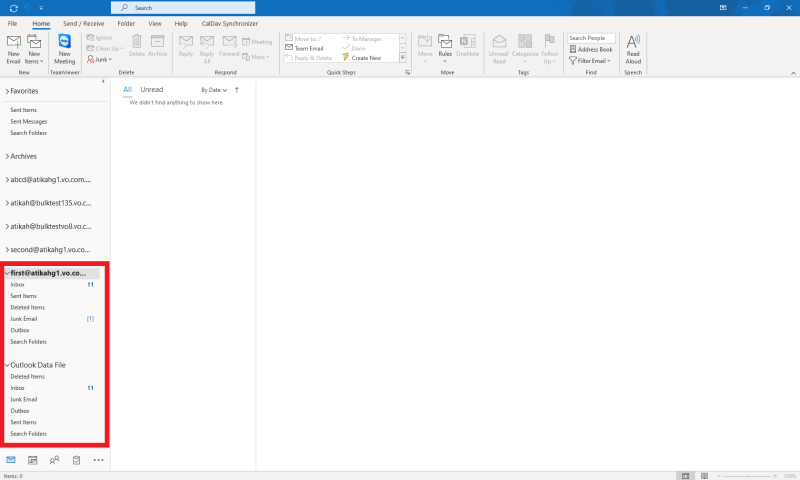
11. Here, you can check and compare the emails in your backup file (Outlook Data File) and your original mail account.
Remove your POP3 mail account
After finished the emails backup, we can proceed to remove the POP3 mail account.
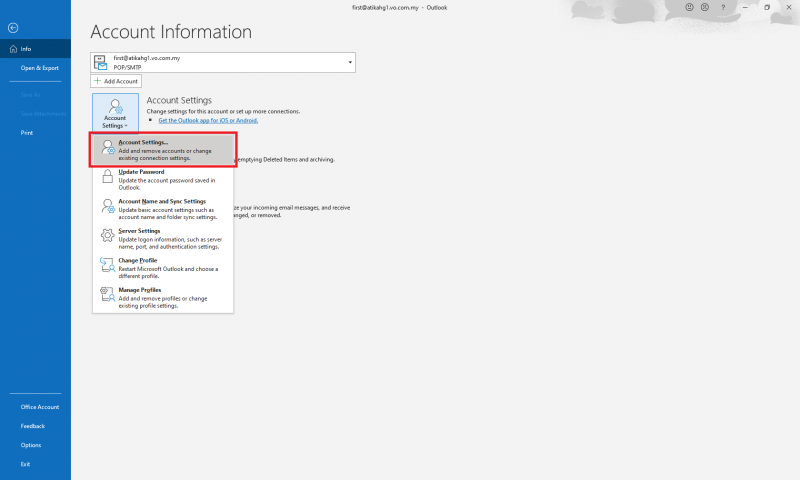
1. Go to [File] > [Account Settings] > [Account Settings].
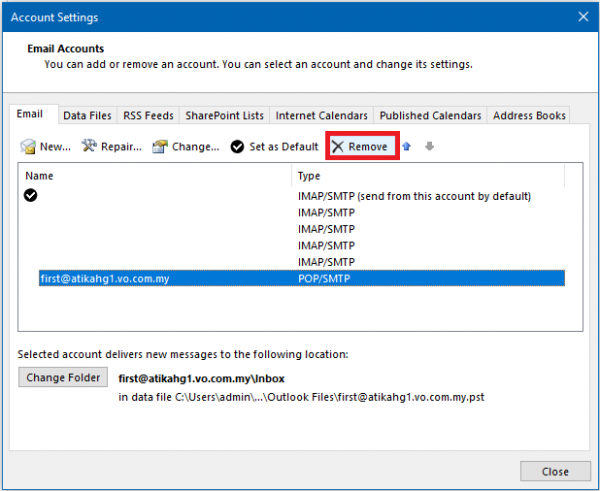
2. Select your mail account and click [Remove].
3. Click on [Yes] to continue.
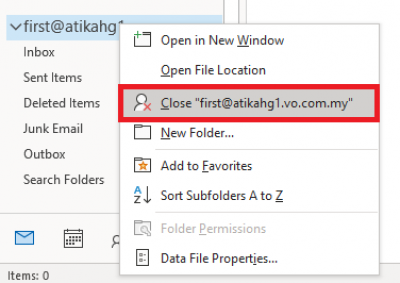
4. You may choose to close both mail account (backup and the previous POP3 mail account) by right-click on the accounts.

